Showing posts with label Dessert. Show all posts

Kourabiedes - Snowy Greek Christmas Biscuits

Let's celebrate Christmas with Greek crunchy snowball biscuits!

Kourabiedes are traditional Greek Christmas shortbread-like biscuits with crunchy almonds inside covered in icing sugar creating a perfect wintery 'snowball' effect. Be careful not to sneeze when eating them as you will create a snowstorm!

Kourabiedes are extremely popular in Greece during the festive season and can be found alongside other Christmas delights such as Melomakarona - click here for my recipe

Every Christmas, my mother and I bake delicious Greek Christmas treats together and Kourabiedes is a family favourite. Christmas would not be the same without a platter full of these crunchy snowball biscuits. They are very different to other Greek sweets as they are dry and not syrupy like most traditional biscuits and cakes, but fear not - they are just as scrumptious!

So as Christmas is nearly upon us, I dusted off our family's Greek cookbook and used it as a basis for my Kourabiedes recipe which is really easy to make and is a perfect sweet treat to share with family and friends. We have been using this cookbook for three generations in our family and although the pages are falling apart, it is honestly the best Greek cookbook I have come across.


Here is my recipe for Kourabiedes (makes 25 biscuits):

Ingredients

50g Caster sugar

250g Unsalted butter

200g Roasted whole almonds or almond flakes (I explain how to roast them below if needed)

2 Egg yolks

1/4 Cup of brandy/ cognac (Be generous - it's Christmas!)

1/4 Teaspoon nutmeg

240g Plain flour

200g Icing sugar

Instructions

1. I only had almond flakes, so I roasted these in the oven for 6 minutes (make sure they don't burn as they will taste bitter) and then I crushed them with my hands into small pieces. I would recommend you use ready roasted whole almonds and crush them with a rolling pin in order to get that delicious crunchy bite, however almond flakes work just as well if you don't have whole almonds in the house (or are lazy like me)!


2. Preheat oven to 160 degrees. In a large mixing bowl, beat together the butter, egg yolks and sugar.


3. Add the cognac/ brandy, nutmeg and almonds to the mixing bowl.

4. Add the flour slowly, mixing all the ingredients together. The dough shouldn't be very sticky, so add some more flour if it is sticking to your fingers or add water if it is too stiff.


5. Add a sprinkle of flour to a surface area and knead the dough for a couple of minutes.


6. Place baking paper over a baking tray. Tear off walnut size pieces of dough and roll into balls or moon shape crescents and place on the baking tray (just like my photo below).


7. Bake the biscuits for 30 minutes. Ensure they don't burn, they should be a light golden colour when they come out of the oven. Allow them to cool for 5 minutes before moving them anywhere.


8. Pour the icing sugar in a bowl, take each biscuit and roll gently in the sugar and then sprinkle a generous amount of sugar on top.


9. Stack all your Kourabiedes on a plate and enjoy them with family and friends. Kala Xristougenna/ Merry Christmas!


Kali orexi - enjoy!!

0

Melomakarona - Traditional Greek Christmas Biscuits


Melomakarona - the ultimate Greek Christmas biscuit dipped in honey with walnuts sprinkled on top!

When I think of Christmas, I have this wonderful memory of my mother and I, spending days upon days in the kitchen, baking Melomakarona. They sum up Christmas in one bite!

Every household in Greece will either bake Melomakarona or buy them from the local bakery to serve to guests during the festive period. I have fond memories of going to family and friend's houses in Athens eating all of their delicious Christmas sweets. Melomakarona isn't the only popular Greek biscuit during this festive period, two other favourites are Kourabiedes (shortbread style biscuits) and Diples (fried dough drizzled in honey).


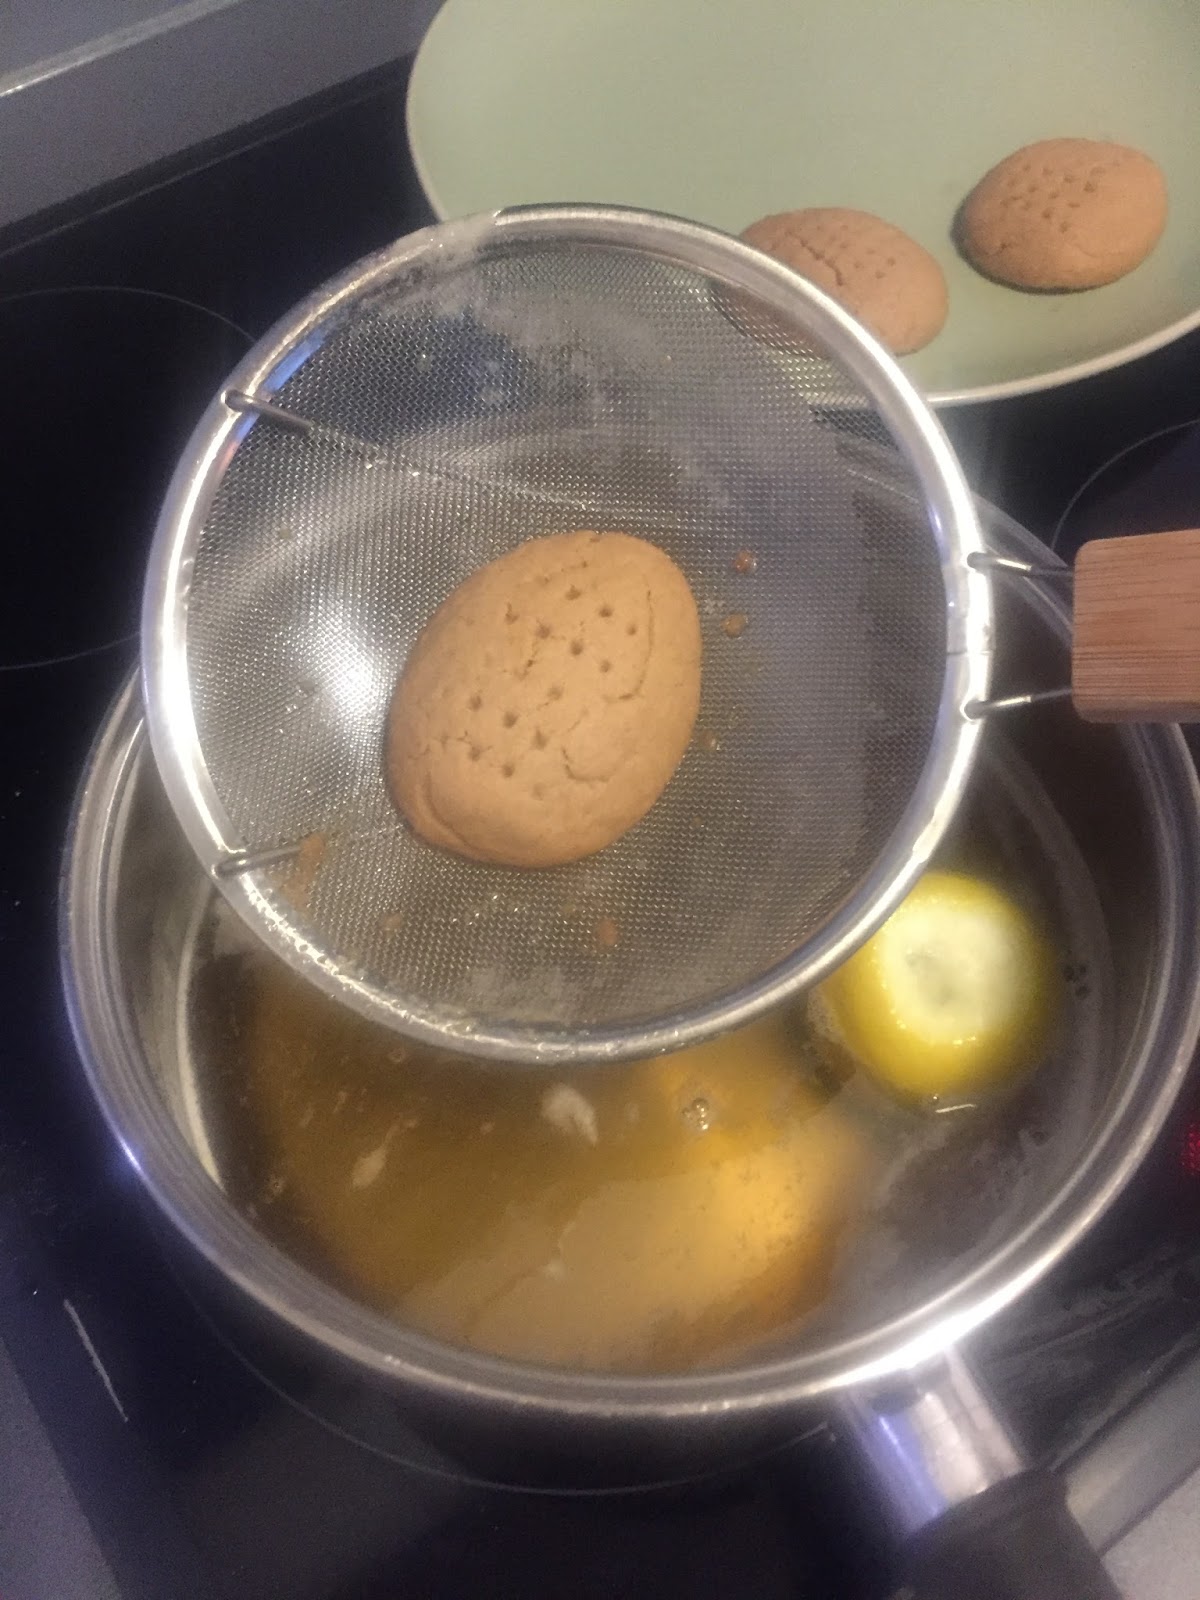
During the years, I have experimented with various recipes for Melomakarona, as the key step is to get the syrup quantity just right. You don't want to soak them for too long as they then will become too syrupy, however a dry biscuit just isn't a Melomakarona so you need to soak them for just the right amount of time to get that that crisp outer edge but soft syrupy middle. Some people allow the biscuits to cool down before dunking in syrup but I recommend doing it when they have just come out of the oven and are still warm. My golden rule of a 4 second dunk in the syrup seems to have nailed the ultimate Greek Melomakarona texture!

I have based my recipe on my favourite Greek chef's version of Melomakarona - Argiro Barbarigou but added in my own twists. Another great thing about these biscuits is that they are dairy-free, however be warned, they are highly addictive!

Here is my recipe for Melomakarona (makes 50 biscuits):

Ingredients

For the biscuits:

240g Olive oil

240g Sunflower oil

50ml Brandy

160ml Orange juice

850g Plain flour

2tsps Baking powder

1tsp Baking soda

200g White sugar

1tsp Clove powder

2tsps Cinnamon

Grated peel of 2 oranges (not waxed)

Chopped/ crushed walnuts for sprinkling on top (a large handful of walnut halves)

For the honey-syrup

400g White sugar

400g Greek honey (I used honey from Samos island in Greece)

400g Water

1/2 Lemon (not waxed)

Instructions

1. Preheat the over at 160 degrees. In a large bowl, mix the olive oil, sunflower oil, brandy, sugar, cinnamon, clove powder and grated orange peel.

2. Pour the orange juice into a measuring jug and mix in the baking soda. It will immediately start to fizz. Pour it into the oil mixture and whisk.


3. In a separate bowl combine the flour and baking powder. Pour this into the oil mixture and mix all together with a whisk or your hands. The key is to not mix the dough too much.


4. Take walnut size pieces of dough and roll into small oval shaped balls to form biscuits. Place them on a baking tray covered in baking paper. Allow a little space between each biscuit as they will rise a bit. Using a fork pinch the top (just like the photo below), this will allow the syrup to seep in later. 


5. Bake for 30min, until they turn a nice golden colour. You may have to do two batches depending on how big your oven is.


6. Whilst the biscuits are cooking, prepare the syrup. Add all of the syrup ingredients into a saucepan and bring to boil for 3-4 minutes.

7. When the biscuits are ready, take them out of the oven and place them to one side. The soaking of the biscuits is the most crucial element. I usually use a slotted spoon (a serving spoon with holes in it) but you can use something similar to dunk the biscuits into the syrup.


8. The best way to get the biscuits to absorb the right amount of syrup is to dunk them whilst they are still hot. Carefully dunk each biscuit, one at a time, into the syrup for 4 seconds (ensure they are full submerged into the syrup) and then place on a clean plate. 

9. Once all biscuits have been dunked, crumble some chopped/ crushed walnuts on top. 


10. When all the biscuits have cooled down, you can stack them on top of each other like the picture below. Store them at room temperature (never in the fridge) in an airtight container or simply put some clingfilm over the plate - they will last for the festive period.


Kala Xristougenna - Merry Christmas!!

Kali orexi - enjoy!!


0

Koulourakia recipe - Greek biscuits


Whenever I think of Greece, I picture myself sitting on my balcony in Samos Island facing the sea, sipping a Greek coffee with a koulouraki first thing in the morning.  No wonder they call the Greek islands paradise!

I grew up eating koulourakia. From a young age even before I drank coffee or even liked it, I remember dipping koulourakia in my mum’s cup in the morning. 

They are extremely popular in Greece and can be found in almost every bakery across the country. It is very traditional to bring them to people’s houses when you are invited round and I have so many memories of aunties and uncles turning up with boxes upon boxes full of freshly baked koulourakia. The big fat Greek family...exists!


If you like dunking your biscuits in coffee or tea, then you will love this recipe, as they are extremely crunchy so perfect for that quick dip before eating. 

In Greece, people traditionally ate them at Easter, however as they have become so popular they are eaten almost everyday. I personally enjoy them with my coffee in the morning however they are also great for that afternoon treat when you are having that work slump at your desk around 3/4pm and need a sugar boost!


For something that is so popular and easy to find in Greece, it is actually surprisingly hard to find them in London. Luckily, they are super easy to make!

Gloomy Sundays in London are for baking, so here is my super duper easy recipe for Greek Koulourakia:


Ingredients for roughly 48 Koulourakia


250 grams butter (make sure its room temperature)  

200 grams sugar 

2 eggs for the mix & 2 eggs for glazing

1 grated orange zest 

1 tsp vanilla extract 

500 grams flour 

2 tsp baking powder 

Sesame seeds for the topping (optional – but I love them)

Baking paper

Instructions

1. Mix together the butter and sugar 

2. Mix in the vanilla extract and orange zest

3. Beat in the 2 eggs, one at a time 

4. Add the flour slowly, whisk continuously 

5. Add the baking powder and mix all together

6. Knead the dough with your hands to ensure that all the flour is mixed in 

7. The dough shouldn’t stick to your hands and needs to be firm - if it is a bit sticky add some more flour

8. Preheat your oven to 175 C


9. Place the dough for the koulourakia on a clean work surface (I always sprinkle a bit of flour on the surface to stop it sticking) 
  
10. You can make whatever shape you like but if you want to keep it traditional and braid the dough like I do: break off a small ball of dough about the size of a chestnut and roll out the dough into a long thin string until it’s about 2cm thick (hopefully my photo below is a good guide)


11. Shape the string into a U shape and twist each piece around to braid. It isn’t as hard as it sounds…trust me!

12. Line your baking tray with baking paper 

13. Lay out the koulourakia on the baking paper and make sure they are not touching

14. Whisk the 2 remaining eggs in a bowl

15. Brush the top of the koulourakia with the egg – this will give your koulourakia that shiny golden brown colour!

16. Bake for 10 minutes

17. Remove from oven and brush on some more egg

18. Bake for another 10 minutes or until golden brown 

19. Sprinkle with sesame seeds (optional)


Leave them to cool down before you move them anywhere. They can last up to 3 weeks in an airtight container - so plenty of biscuits for dunking!


Kali orexi - Enjoy!!

3